Link aggregation (usually abbreviated as LAG) allows us to combine multiple ports in parallel, which accomplishes two goals:
- It increases the amount of throughput; for example, if you have two trunk ports per switch, you will have more throughput than you would with a single port.
- It provides some redundancy in case one or more ports go down
The LAGGS option does not refer to an interface. Rather, it refers to LAGG the FreeBSD link aggregation and link failover driver. Typically, trunk ports involve some form of link aggregation. With some switches, trunks have to be configured as pairs of ports.
There are two ways to add a new LAGG interface: at the console and within the web GUI. To add a new LAGG interface at the console, log into the console and do the following:
- Enter 1 to enable interfaces.
- When the console queries “Do you want to configure LAGGs now? [y/N]:”, enter ‘y’ and press [Enter].
- The console will list all the LAGG-capable interfaces. Enter the LAGG member to aggregate (e.g. em0, em1, etc.), or nothing if you are finished.
- At the next console prompt, enter the LAGG protocol (default: none, lacp, failover, loadbalance, roundrobin). These options are as follows: Protocol Description NONE Disables traffic, but does not disable the interface. LACP The Link Aggregation Control protocol, defined by IEEE 802.3ad. LACP provides a form of load balancing by automatically bundling together links. FAILOVER One port is designated as the active port; all other ports are used as failover ports. If the active port goes down, one of the failover ports becomes the new active port. FEC This protocol supports Cisco Fast EtherChannel, unlike most of the other options, it is a static setup. LOADBALANCE This protocol balances all outgoing traffic on the member ports. This is also a static setup. ROUNDROBIN Distributes outgoing traffic in a round robin fashion; in other words, in equal slices and in a circular pattern.
- If LACP is selected, enter ‘y’ if you want to enable LACP fast timeout. If this is enabled, then one of the channels will time out after about 1 second. In the end, you must decide if 1 second is long enough, or if you should allow a few dropped packets so you won’t have to rebuild the LACP link.
- The next prompt is whether you want to configure VLANs. Enter ‘y’ if you want to configure VLANs, or ‘N’ otherwise.
- Finally, assign the interfaces for WAN, LAN, OPT1, and other interfaces.
You can also add a LAGG interface in the web GUI. To add an interface, log into the web GUI and do the following:
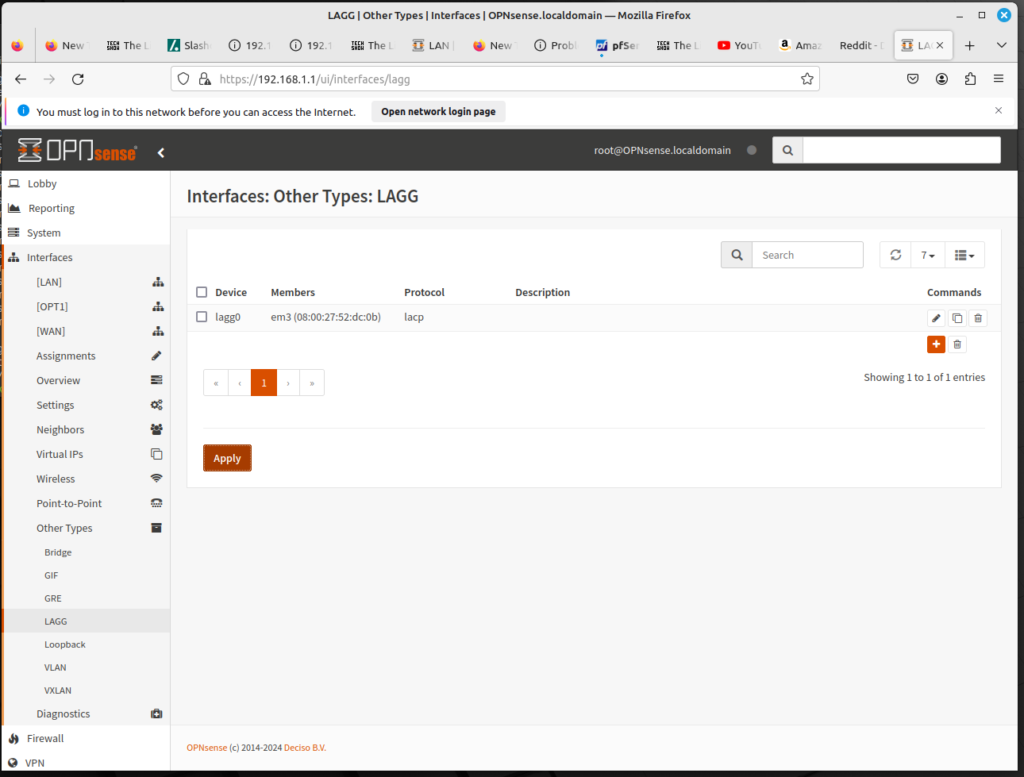
- On the left sidebar menu, click on Interfaces, Other Types, and LAGG.
- Here you will see a table listing all the LAGG interfaces. Click on the plus (+) icon to add an interface.
- In Parent, use the drop-down box to select the parent interface used for link aggregation.
- In the Proto drop-down box, select the protocol. See above for a table with an explanation.
- For the Fast timeout checkbox, select this option if you want a fast timeout (approximately 1 second). The costs and benefits of enabling this option are discussed above.
- In the Use flowid drop-down box, select Yes (use the hash from the network card, if available), No (a hash is locally calculated), or Default (the value depends on the system tunable net.link.lagg.default_use_flowid). You may need to change this value if you are having a problem with flapping.
- In the Hash Layer drop-down box, set the packet layers to hash for aggregation protocols which load balance. The options are options that correspond, respectively, to the data link, network, and transport layers:
- Layer 2 (source/destination MAC address and optional VLAN number)
- Layer 3 (source/destination IPv4/IPv6 address)
- Layer 4 (source/destination port)
- In the Use strict drop down box, select Yes to enable strict LAGG enforcement, No to disable enforcement, and Default to use the value from the system tunable net.link.lagg.default_strict_mode. Enabling strict mode ensures that LAGG does not come up unless your switch is speaking LACP.
- In the MTU edit box, enter the Maximum Transmission Unit for this LAGG interface. If you leave this field blank, the smallest MTU of the LAGG’s children will be used.
- In the Description edit box, enter a brief (non-parsed) description.
- At the bottom of the page, click on Save to save this configuration (or Cancel to cancel this configuration), then click on the Apply button at the bottom of the table to apply the settings.
As you can see, you have more options with the web interface than with the console. But the fact LAGG can be configured at the console demonstrates how fundamental LAGG is considered to be in OPNsense.
