A router or firewall can modify the IP address of packets passing through them; this is done on purpose to implement the network design. This is commonly known as Network Address Translation (NAT).
In a nutshell, IPv4 uses 32-bit addresses, capable of uniquely addressing about 4.4 billion devices. By 1992, it become evident that that would not be enough. In 1994, RFC 1631 was issued, which described NAT as a short-term solution to the two most compelling problems facing IP addressing at the time: IP address depletion and scaling in routing. By 2004, NAT became widespread.
In the meantime, IPv6 has become widespread and has more than enough addresses and therefore does not rely on NAT. But in particular scenaros (e.g. failover with several ISPs), NAT has also crept into IPv6 designs.
Most ISPs use DHCP to dole out public IP addresses; thus every DSL router uses NAT so that all its clients can access the Internet via a single public IPv4 address. The hotspot function of a smartphone uses the same technology. Finally, a large corporate firewall uses a pool of IP addresses for address translation to enable Internet access for all clients.
How to Configure a NAT Rule
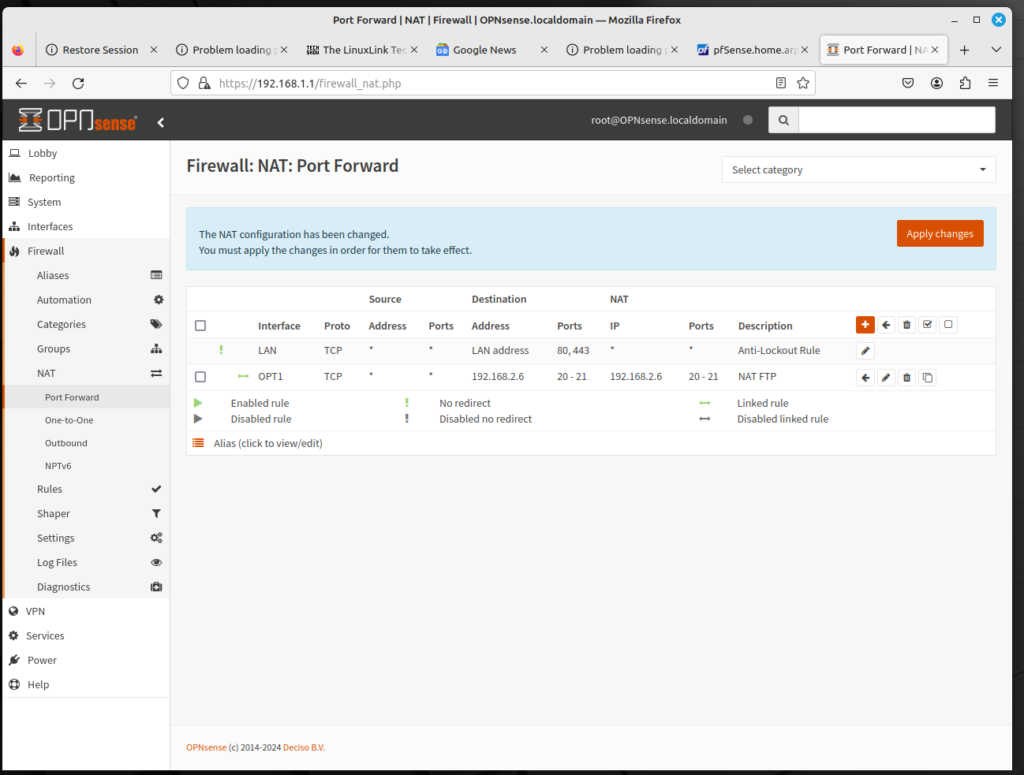
Configuring a rule for Network Address Translation is relatively easy. Let’s assume that we need to have a port open for our FTP server, whose IP address is 192.168.2.6. You will have to configure ports 20 (for data) and 21 (for commands) for port forwarding. To configure a NAT entry, do the following:
- Log into the OPNsense web GUI; on the left sidebar menu, click on Firewall, click on NAT, and click on Port Forward.
- In the Port Forward table, click on the plus (+) icon to add a rule.
- For Interface, select OPT1 for the DMZ network.
- Keep TCP/IP Version as IPv4 and Protocol as TCP.
- For Destination, type 192.168.2.6 in the edit box.
- For Destination port range, in the drop down box, select (other). Then in the edit boxes, type 20 and 21.
- For Redirect target IP, type 192.168.2.6 in the edit box.
- For Redirect target port, select (other) in the drop down box and type 20 in the edit box.
- For Log, select the check box.
- In Description, type a brief description in the edit box (e.g. “FTP NAT”).
- In Filter rule association, keep “Add associated filter rule”.
- At the bottom of the page, click on the Save button to save the entry, then click on Apply Changes at the top of the page to reload firewall rules.
- On the left sidebar menu, click on Rules, then click on OPT1. You should see the firewall rule for FTP. If you want to alter the order of the rules, you can do that here.
Once you have done this, your Internet-facing FTP server at 192.168.2.6 should be publicly available. There are three other forms of NAT to consider: One-to-one, Outbound, and NPTv6. We will configure these in future articles.
