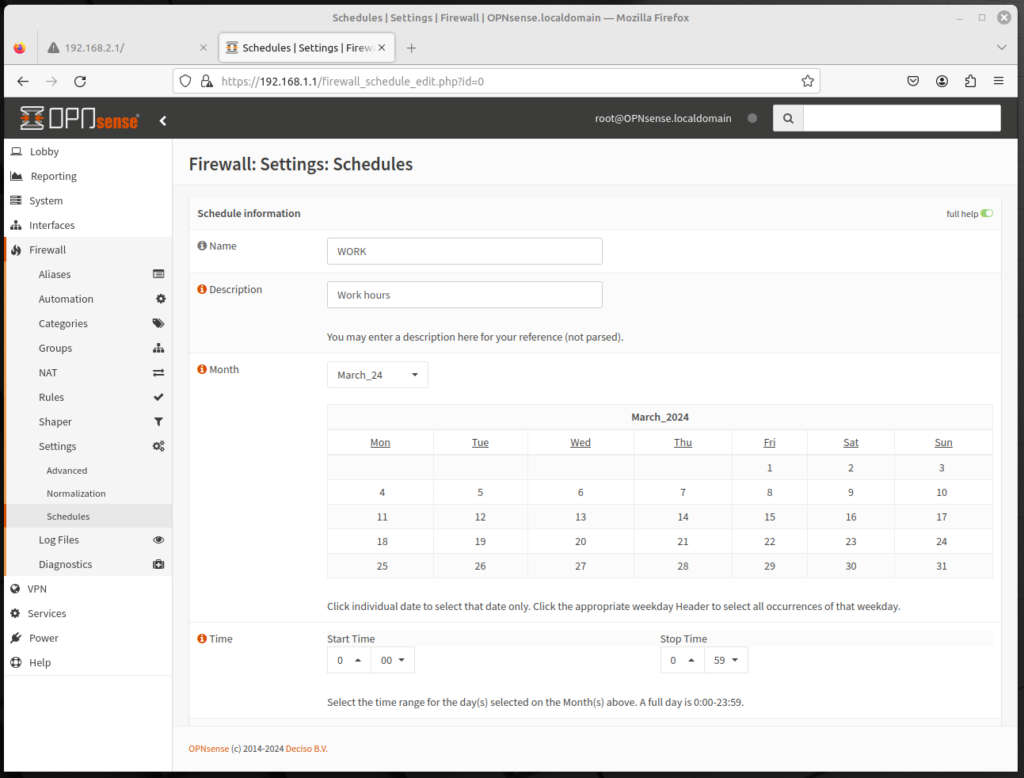
Rules don’t have to take effect at all times. We can define time ranges during which the rules apply, and the process is even easier than creating rules. Each rule can have a different time range, or multiple time ranges, and once these ranges are defined, it can be applied to a rule.
To add a schedule entry, do the following:
- Log into the OPNsense web GUI, and on the left sidebar menu, click on Firewall, click on Settings, and click on Schedule. Then click on the plus (+) icon to add a schedule entry.
- In the Name edit box, enter a name for this schedule entry. (e.g. WORK_HOURS).
- In the Description edit box, enter a brief (non-parsed) description.
- In the Month drop-down box, select the month. There will be a monthly calendar for the selected month. Click on an individual date to select a date, or click on the day header at the top of the calendar to select a day of the week (e.g. Monday or Wednesday).
- In the Time drop-down box, select the Start Time and the End Time for the schedule entry.
- In the Time Range Description edit box, enter a (non-parsed) time range description.
- Click on the Add Time button to add this time to the schedule entry, or Clear Selection to reset the page.
- When you are done making changes, click on the Save button (or Cancel) to save the schedule entry.
This will save a schedule entry, which we can then apply to a firewall rule. To apply the schedule entry to a firewall rule, on the left sidebar menu, click on Firewall, click on Rules, and click on the interface to which the rule will apply. Then scroll down to Schedule, and from the drop-down box, select the schedule entry which was defined previously.
In the next article, we will show how to apply a schedule in a real-world scenario. But until then, this should help you get started in scheduling.
