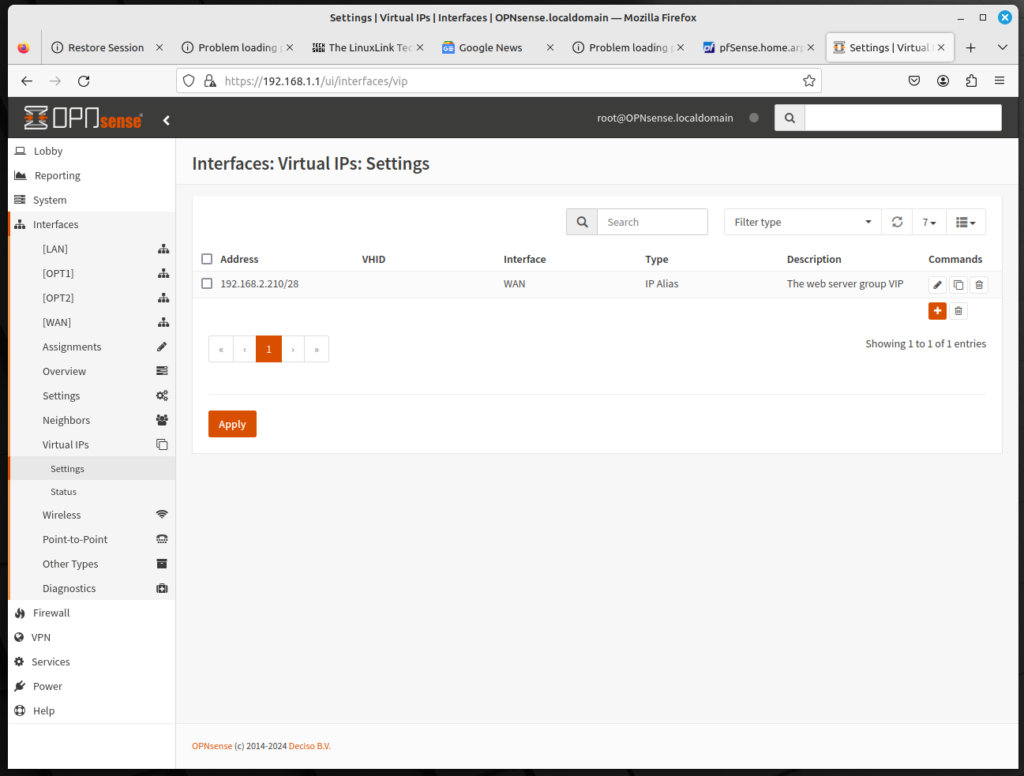
Virtual IPs refer to a situation where a single IP address does not correspond to a single physical address. The situation presented involves many scenarios; these scenarios include the following:
- NAT, including one-to-many NAT
- CARP, and scenarios where fault tolerance is required
- Mobile IP scenarios, including situations where a mobile user has the same IP address even as their actual IP address changes
To add a Virtual IP, do the following:
- Log into the OPNsense web GUI, and on the left sidebar menu, click on Interfaces, click on Virtual IPs, click on Settings, and click on the plus (+) icon to add a rule.
- You can now add a Virtual IP. OPNsense offfers four options for a Virtual IP:
- IP Alias: IP aliases work like any other IP address on an interface such as the actual interface IP address. They will respond to layer 2 (thus, they can be used by Address Resolution Protocol, or ARP). They can also be used as binding addresses by services on the firewall. OPNsense will respond to a ping on an IP alias, and services that bind to all interfaces will also respond on IP Alias VIPs unless the VIP is used to forward those ports to another device.
- CARP: This refers to Common Address Redundancy Protocol. It’s primarily used with High Availability redundant deployments using CARP. CARP VIPs have their own unique MAC address derived from their VHID.
- Proxy ARP: Proxy ARP provides ARP replies for the specified IP address or a CIDR range of IP addresses. This allows OPNsense to accept traffic targeted at addresses inside a shared subnet.
- Other: Other type virtual IPs define additional IP addresses for use when ARP replies for the IP address are not required.
- To create a Virtual IP first select one of the four options. Then select a physical interface in the Interface drop-down box.
- In the Address edit box, you can provide the IP address and the subnet to use.
- In the Deny service binding checkbox, check this option if you don’t want services to bind to the virtual IP address.
- The VHID group box can be left blank, unless you are configuring a CARP virtual IP. Otherwise, you must enter a number from 1 to 255.
- In the Description edit box, enter a brief description.
- Click on the Save button at the bottom of the page to save this virtual IP address, and click on Apply at the bottom of the page to reload the firewall rules.
That handles the settings for IP Alias. With other options, there are more settings:
- For CARP, in the Password edit box, enter the VHID password.
- For CARP, in the advbase edit box, enter the base of the advertising interval, in seconds. Acceptable values are from 1 to 255.
- For Proxy ARP, in the Disable Expansion edit box, check this box to disable the expansion of this entry IP onto NAT lists.
If you have followed this configuration, you will have successfully added a virtual IP.
