Tkinter GUI Framework: Part Three

Tkinter GUI

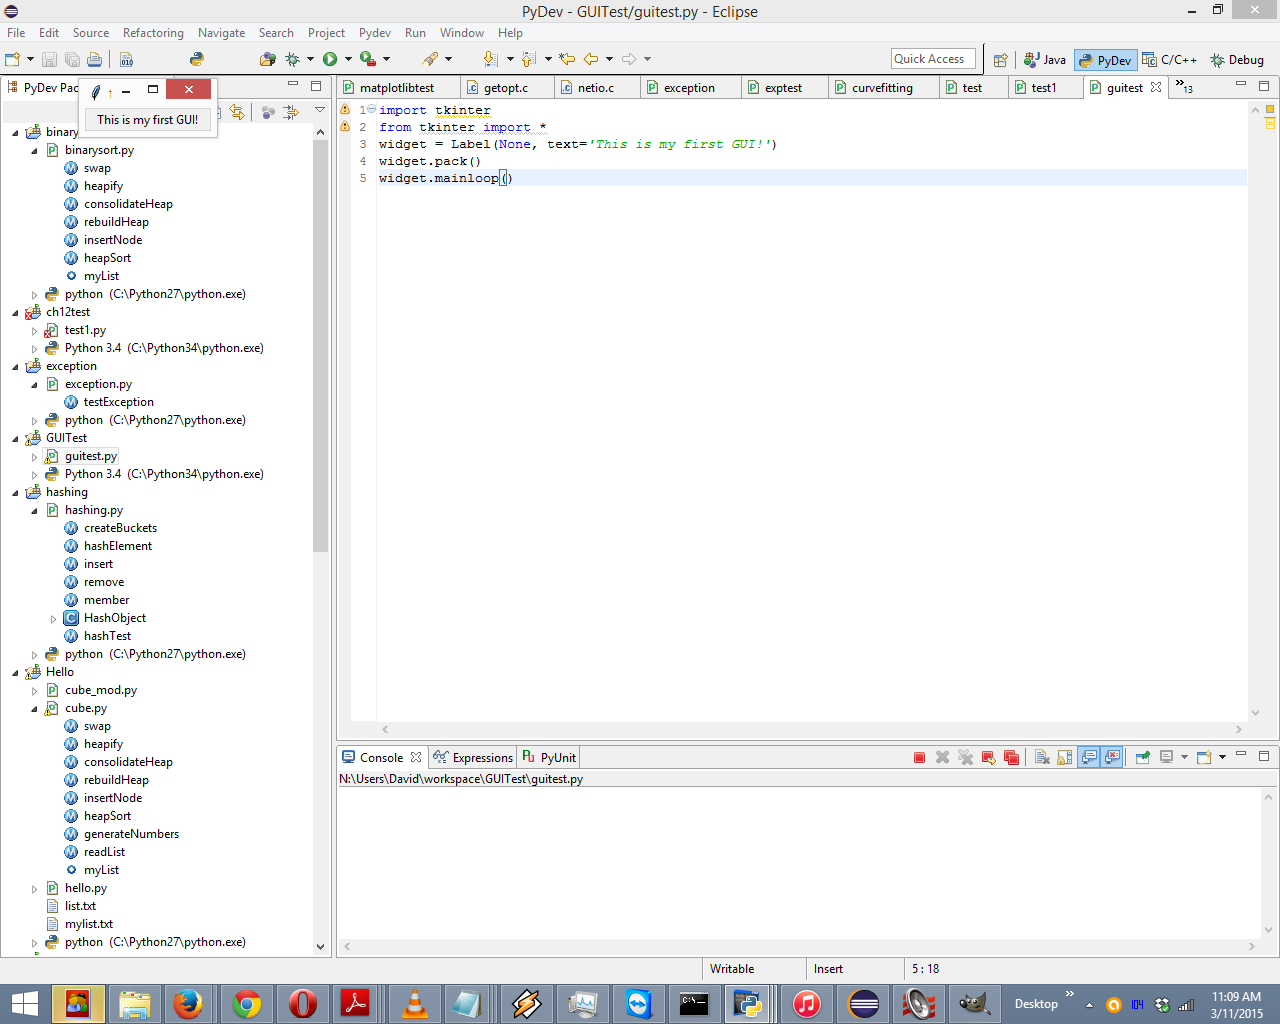
Creating dialog boxes in Tkinter using the Pydev module with Eclipse.

Form and function are key to creating a good GUI. In this article, we’ll go one step further and control the actual appearance of widgets.

Up to this point, we have used the default look for our widgets. This is somewhat drab, so to create programs that are visually appealing, we want to tweak the look of our widgets. For example, we can change the font and background/foreground colors.

import tkinter
from tkinter import *
root = Tk()
labelfont = ('times', 36, 'italic')

widget = Label(root, text='This is a test.')
widget.config(bg='black', fg='blue')

widget.pack(expand=YES, fill=BOTH)
root.mainloop()

Although all the program does is display a window with some text in it, the design does draw the user’s attention.

Radio Buttons and Checkboxes

In addition to windows, frame, labels and buttons, sometimes you want to use radio buttons and checkboxes to give your users more choices. Aside from appearance, radio buttons and checkboxes differ in one significant way: radio buttons offer users a list of options, but allow them to select only one; checkboxes offer users many options and lets them choose as many as they want.

For example, here’s some code that implements radio buttons:

import tkinter 
from tkinter import *
state = ''
buttons = []

def choose(i): 
	global state
	state = i
	for btn in buttons: 
		btn.deselect()
	buttons[i].select()

root = Tk()
for i in range(4):
	radio = Radiobutton(root, text=str(i), value=str(i), command=(lambda i=i: choose(i) )
	radio.pack(side=BOTTOM) 
	buttons.append(radio)

root.mainloop()
print("You chose the following number: ",state)

This program creates a series of buttons ranging from 0-3 (four in total) with the number 1, 2 and 3 highlighted by default. The user can then choose any of the buttons. Once a button is chosen, any other button’s state becomes False, meaning that the button is no longer selected. When the users close out of the program, they are given a statement showing which number they chose.

For a similar effect with checkboxes, try this code:

from tkinter import *
states = []
def check(i):
	states[i] = not states[i]

root = Tk()

for i in range(4):
	test = Checkbutton(root, text=str(i), command=(lambda i=i: check(i)) )
	test.pack(side=TOP)
	states.append(0)
root.mainloop()
print(states)

The last line in the program is print(states), which prints out the states list – the values of the check boxes. This, if you check off boxes 1 and 4, your result will be:

[True, 0, 0, True]

Dialog Boxes

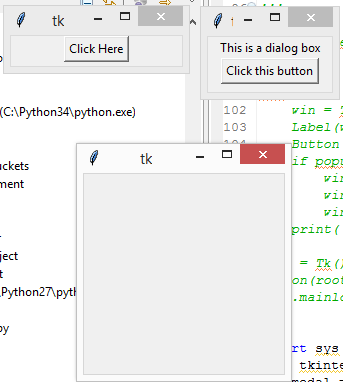
Sometimes you will want to give the user a piece of additional information. You have probably seen dialog boxes in programs. They pop up whenever there is an error, or a program wants to confirm something. Tkinter offers two types of dialog boxes: modal and nonmodal. Modal dialog boxes wait for some action from the user before going away, andpause the progress of the program. Nonmodal dialog boxes do not interrupt the flow of the program.
Creating a dialog box in Tkinter is almost a trivial process. For example, we can create a simple function to generate a dialog box like so:

def dialog():
	win = Toplevel()
	Label(win, text='This is a dialog box').pack()

We need some means of invoking the dialog box from the main window, so the main program will have this code:

root = Tk()
Button(root, text='Click This', command=dialog).pack()
root.mainloop()

You will also need the usual headers at the beginning:

import sys
from tkinter import *

This will create a main window, and when you click on the button in the main window, it will launch a simple, nonmodal dialog box that has some text in it. This is OK, but we really want a dialog box that actually does something, so let’s rewrite the dialog function:

def dialog():
	win = Toplevel()
	Label(win, text='This is a dialog box').pack()
	Button(win, text='Click this button', command=win.destroy).pack()
	if makemodal:
		win.focus_set()
		win.grab_set()
		win.wait_window()

You will need to add this line before the dialog function:

makemodal = (len(sys.argv) > 1)

When the button in the main window is clicked, the program will launch a modal dialog box and that box will take the focus. When you click on the button in the dialog box, it will close itself, and the original window will take back focus.

External Links

How to Install Tkinter at unpythonic.net

Tkinter wiki at python.org

Tkinter GUI Framework: Part Two

Tkinter GUIIn the previous article, we introduced Tkinter and provided some simple examples. In this article, we will introduce the concept of layouts.

GUI Layouts: Widget Hierarchy and Packing Order

When creating a GUI, it is important to consider the hierarchy of the widgets inside the GUI. This hierarchy is commonly referred to as parent-child. Let’s consider a simple example:

from tkinter import *

def fcall():
	print('This is a function call.')

win = Frame()
win.pack()
Label(win, text='Click Function to make a function call or Quit to Exit').pack(side=TOP)
Button(win, text='Add', command=result).pack(side=LEFT)
Button(win, text="Quit', command=win.quit).pack(side=RIGHT)

The first widget here is the top-level window, which acts as a parent. Next, we have a widget called win, which has a child of its own: a frame widget. The win widget is a child of the top-level window.

Next, we have a label and two buttons, all of which are children of the frame widget. A frame widget is a widget whose purpose is to hold other widgets, and thus allow the programmer the flexibility to create a layout determining where on the window each widget should appear. GUI programming involves working with many different frame widgets, each occupying a specific spot on the top-level window, with each frame having its own set of widgets. These widgets that belong to each frame will, as children of their own respective frame, be limited to the space provided them by their parent frame.

For example, if you have two frames of the same size, each taking up half the window, and assign a button widget to each frame, the button assigned to the left frame will only be able to be placed within the left-hand side of the window. Likewise, the button assigned to the frame on the right side will be constrained to that section. If you were to pack the button in the left frame to the right, it would appear to the user to be in the center of the top-level window.

Another important aspect of layout is known as packing order. When you create each widget, and pack them, they are given all of the space for their region. For example, if you pack a button on the LEFT, it will occupy all of the left-hand space. When you create a second widget and pack it to the left as well, the initial button is shrunk, but still holds the left-most space. This process continues, with each button shrunking to provide room for the other widgets. However, the buttons never move from their original space. The first button packed to the left will always be the leftmost. Likewise, the second button packed to the left will always be the second closest to the left.

For example, we could rearrange our code from earlier to demonstrate how this works:

from tkinter import *

def fcall():
	print('This is a function call.')

win = Frame()
win.pack()
Button(win, text='Add', command=result).pack(side=LEFT)
Label(win, text='Click Function to make a function call or Quit to Exit').pack(side=TOP)
Button(win, text="Quit', command=win.quit).pack(side=RIGHT)

This shows how the program looked before we modified the code:

Tkinter GUI

And this is how it looks with the modified code:

Tkinter GUI

External Links

How to Install Tkinter at unpythonic.net

Tkinter wiki at python.org

Tkinter GUI Framework: Part One

Tkinter

Tkinter in action with the PyDev module in Eclipse under Windows 8.1.

There is wide support for writing GUIs with Python with many different toolkits. These toolkits, binary modules for Python that interface with native code written in C/C++, all have different APIs and different feature sets. Only one comes with Python by default: the TK GUI toolkit.

Other options are wxPython, PyQT, and pyGTK. For this series of articles, we will be using Tkinter, which is Python’s standard GUI package and comes installed with Python. It is perhaps the most used GUI programming kit and is portable across virtually every platform.

Installing Tkinter

If you installed Python under Windows, the Python Windows installer includes Tcl/Tk as well as Tkinter. This is essentially a one-click install of everything needed. Linux and the BSD platforms require a separate installation of Tcl/Tk. This is usually available as a binary package. Under Ubuntu/Debian/Mint, you can use the following command:

sudo apt-get install python python-tk idle python-pmw python-imaging

This installs Python, Tkinter (which is not really needed since it automatically gets installed with Python), IDLE, Python MegaWidgets and PIL. In Fedora Core, it’s:

yum install tinker

Getting Started with Tkinter

The first thing to understand is that most GUI frameworks, including Tkinter, are based on a widget model. A widget is a component of a GUI. Buttons, labels and text boxes are all widgets. Most widgets have graphical representations on screen, but some widgets (such as tables and boxes) exist only to contain other widgets and arrange them on the screen. A GUI is constructed out of an arrangement of widgets.

In this script, we create a GUI of a simple window and a label:

import tkinter
from tkinter import *
widget = Label(None, text='This is my first GUI')
widget.pack()
widget.mainloop()

The first thing the script does is import the Tkinter module. Next, we could either import Label from Tkinter, for simply import all (*) from Tkinter (we did the latter). After that, we create an object for each widget (in this case, Label). The Label is then arranged in the parent window. Finally, the widget is displayed.

This is acceptable as a first GUI script, but it would be nice if the label would re-center itself when the dialog box that contains it is resized (if you try to resize it, you will see that this is not the case). However, we can fix this with a small code change:

import tkinter
from tkinter import *
Label(text='This is my first GUI').pack(expand=YES, fill=BOTH)
mainloop()

When you run the program, try resizing the window. You will see the “This is my first GUI” text label stay centered no matter what the window looks like.

In these initial examples, we created the widgets and configured them at the same time. However, we may want to wait to configure them after they are created:

import tkinter
from tkinter import *
root = Tk()

widget = Label(root)
widget.config(text='This is my first GUI')
widget.pack(side=TOP, expand=YES, fill=BOTH)
root.mainloop()

In this example, we called upon the configure method to achieve the same result as in the previous example. If we wanted to, we could change the appearance of the widget later in the program.

External Links

How to Install Tkinter at unpythonic.net

Tkinter wiki at python.org