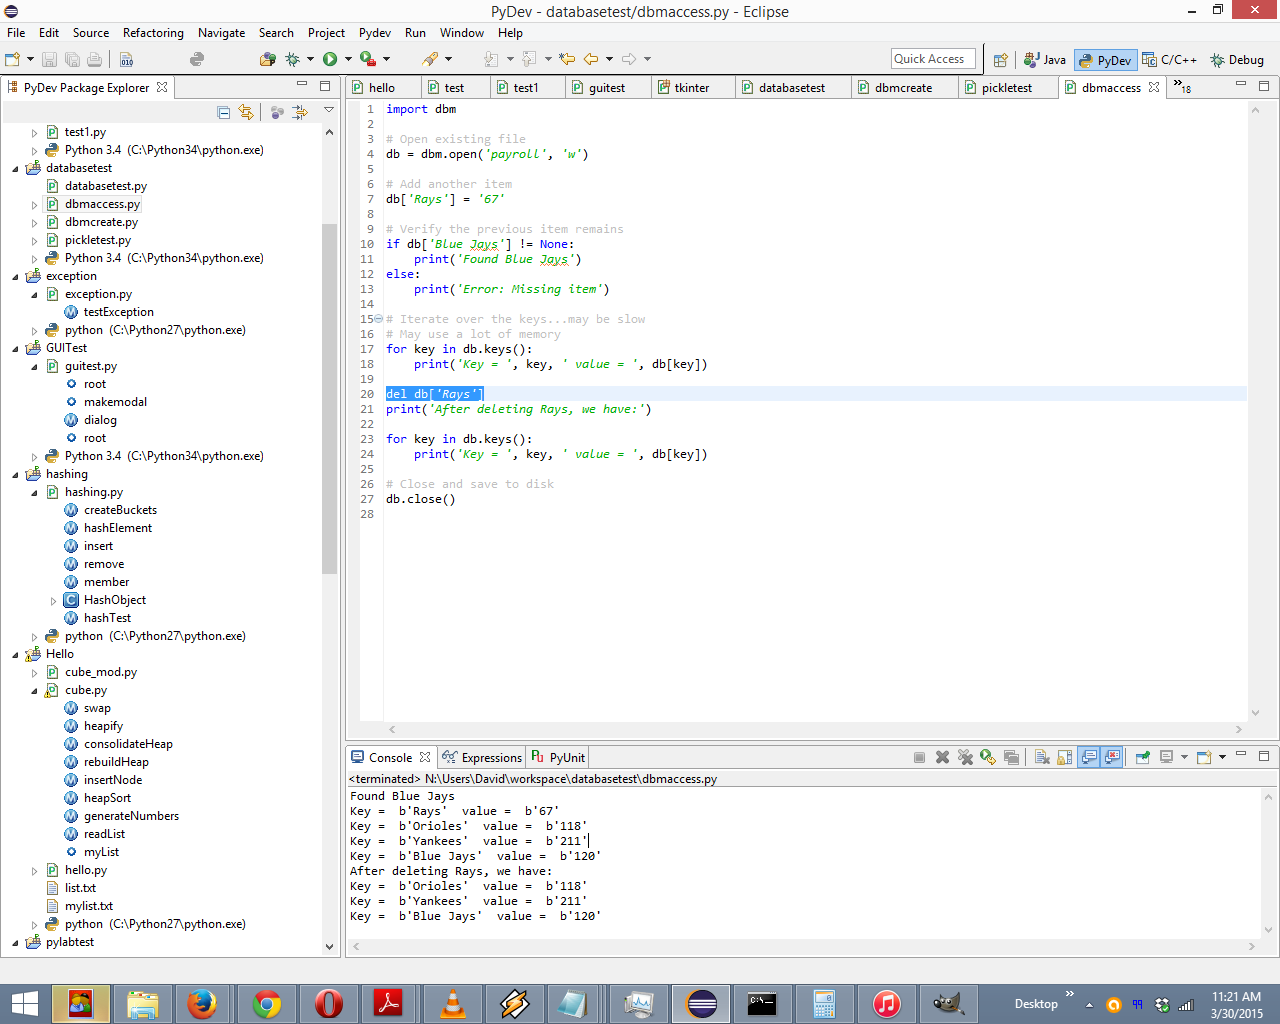
Python Database Programming: Part Three

Python Database ProgrammingIn the previous article, we showed how to create, access and modify a persistent dictionary in Python using the dbm module. In this article, we will consider using Python to create, access and modify a relational database.

The dbm modules work well when your data needs to be stored as key/value pairs. You can store more complicated data within key/value pairs with some imagination. For example, you can create formatted strings that use a comma or some other character to delimit items in the strings. This, however, can be difficult to maintain, and it can restrict you because now your data is stored in an inflexible manner. In addition, some dbm libraries limit the amount of space you can use for the values – sometimes to a maximum of 1024 bytes.

The upshot of all this is that if your data needs are simple and you only plan to store a small amount of data, you should use a dbm persistent dictionary. If, on the other hand, you require support for transactions and if you require complex data structures or multiple tables of linked data, you should use a relational database. If you use relational databases, you will also find that they provide a far richer and more complex API than the simple dbm modules.

Python Database Programming: Introducing Relational Databases

In a relational database, data is stored in tables that can be viewed as two-dimensional data structures. The columns, or vertical part of the two-dimensional matrix, are all of the same type of data (e.g. strings, numbers, dats, etc.). Each horizontal component of the table is made up of rows, also called records. Each row is made up of columns. Typically, each record holds the information pertaining to one item.

idnum last name first name age Team left-handed total war earliest free agency
100 d’Arnaud Travis 26 18 No 0.0 2020
101 Duda Lucas 29 18 Yes 2.9 2018
102 Harper Bryce 22 20 Yes 9.6 2019

This table holds seven columns about baseball players:

  • idnum: The player’s ID number. Relational databases make extensive use of ID numbers where the database manages the assignment of unique numbers so that each row can be referenced with these numbers to make each row unique, even if they have identical data. We can then refer to the player by the ID number. The ID number alone provides enough information to look up the employee.
  • lastname: Holds the person’s last name.
  • firstname: Holds the player’s first name.
  • age: Holds the player’s age.
  • team: Holds ID of the player’s team.
  • left-handed: Holds whether the player is left-handed.
  • total war: Holds the player’s total WAR (Wins Above Replacement).
  • earliest free agent: Holds the earliest year the player will be eligible for free agency.

In this example, the column idnum, the ID number, would be used as the primary key. A primary key is a unique index for a table, where each element has to be unique because the database will use that element as the key to the given row and as a way to refer to the data in that row, in a manner similar to dictionary keys and values in Python. Thus, each player needs to have a unique ID number, and once we have an ID number, we can look up any player. Therefore it makes sense to make idnum the key.

The team column holds the ID of a team – that is, an ID of a row in another table. This ID could be considered a foreign key, because the ID acts as a key into another table.

For example, here is a possible layout of the teams table:

team id name ballpark
18 New York Mets Citi Field
20 Washington Nationals Nationals Park

In these examples, Travis d’Arnaud and Lucas Duda play for team 18, the New York Mets. Bryce Harper plays for team 20, the Washington Nationals.

In a large enterprise, there may be hundreds of tables in the database with thousands (or even millions) of records. In the next article, we will cover how to make SQL queries with Python.

External Links:

Python Database Programming at wiki.python.org

Python Database Programming at python.about.com

Databases at docs.python-guide.org

Python Database Programming: Part Two

Python database programming

Using the Eclipse IDE to access and modify a Python persistent dictionary.

In the previous article, we introduced Python database programming , the concept of persistent dictionaries, and different database modules such as dbm. In this article, we will put it all together and use the dbm module to create, access and modify a persistent dictionary.

All of the dbm modules support an open function to create a new dbm object. Once opened, you can store data in the dictionary, read data, close the dbm object as well as the associated data file/files, remove items and test for the existence of a key in the dictionary.

Python Database Programming: Creating a Persistent Dictionary

To open a dbm persistent dictionary, use the open function on the module you choose. For example, we can use this code to create a persistent dictionary with the dbm module:

import dbm

db = dbm.open('payroll', 'c')

# Add on item
db['Orioles'] = '118'
db['Yankees'] = '211'
db['Blue Jays'] = '120'

print(db['Orioles'])

# Close and save to disk
db.close()

When you run this script, you will see output like the following:

b'118'

This example, which creates a ‘payroll’ dictionary with three entries, uses the recommended dbm module. The open function requires the name of the dictionary to create. The name gets translated into the name of the data file or files that may already be on the disk. The dbm module may create more than one file (usually a file for the data and one for the index of the keys), but it does not always do this. The name of the dictionary is treated as a base file name, including the path. Usually, the underlying dbm library will append a suffix such as .dat for data. You can find the file yourself by looking for the file named payroll, most likely in your current working directory.

There is also an optional flag. The following table lists the available flags:

Flag Usage
C Opens the data file for reading and writing, creating the file if needed.
N Opens the file for reading and writing, but always creates a new empty file. If one already exists, it will be overwritten and its contents lost.
W Opens the file for reading and writing, but if the file doesn’t exist it will not be created.

You can also set another optional parameter, the mode. The mode holds a set of UNIX file permissions.

The above code is simple. First, we use the open method of the dbm module, which returns a new dbm object (db), which we can then use to store and retrieve data.

Once we open a persistent dictionary, we can write values as we normally would with Python dictionaries, as shown in this example:

db['Orioles'] = '118'

Both the key and value must be strings and cannot be other objects, like numbers or Python objects. But if you want to save an object, you can serialize it using the pickle module:

import pickle

data = {
        'Orioles' : ['118', 'Dan Duquette', 'Buck Showalter', 'Camden Yards'],
        'Yankees' : ['211', 'Brian Cashman', 'Joe Girardi', 'Yankee Stadium III'],
        'Blue Jays' : ['120', 'Alex Anthopoulos', 'John Gibbons', 'Rogers Centre']
        }

with open('data.pickle', 'wb') as f:
    pickle.dump(data, f, pickle.HIGHEST_PROTOCOL)
    
with open('data.pickle', 'rb') as f:
    data = pickle.load(f)

Finally, the close method closes the file or files and saves the data to disk.

Python Database Programming: Accessing and Modifying the Persistent Database

With the dbm modules, you can treat the object you get back from the open function as a dictionary object. You can get and set values using code like the following:

db['key'] = 'value'
value = db['key']

Remember that the key and the value must both be text strings.

You can delete a value in the dictionary using del:

del db['key']

As with a normal dictionary, the keys method returns a list of all the keys:

for key in db.keys():
	# do something else

The keys method may take a long time to execute if there are a huge number of keys in the file. Also, this method may require a lot of memory to store the potentially large list that it would create with a large file.

Here’s a script we can use to access the persistent dictionary we created with the first script:

import dbm

# Open existing file
db = dbm.open('payroll', 'w')

# Add another item
db['Rays'] = '67'

# Verify the previous item remains
if db['Blue Jays'] != None:
    print('Found Blue Jays')
else:
    print('Error: Missing item')
    
# Iterate over the keys...may be slow
# May use a lot of memory
for key in db.keys():
    print('Key = ', key, ' value = ', db[key])
    
del db['Rays']
print('After deleting Rays, we have:')

for key in db.keys():
    print('Key = ', key, ' value = ', db[key])
    
# Close and save to disk
db.close()

When you run this script, you should see output similar to the following:

Found Blue Jays
Key =  b'Rays'  value =  b'67'
Key =  b'Orioles'  value =  b'118'
Key =  b'Yankees'  value =  b'211'
Key =  b'Blue Jays'  value =  b'120'

After deleting Rays, we have:

Key =  b'Orioles'  value =  b'118'
Key =  b'Yankees'  value =  b'211'
Key =  b'Blue Jays'  value =  b'120'

This script works with a small database of major league baseball teams and their payrolls (in millions of dollars). You need to run the first script in this article first. That example creates the dbm file and stores data in the file. This script then opens the preexisting dbm file.

The script opens the persistent dictionary payroll in read/write mode. The call to the open function will generate an error if the necessary data file or files do not exist on disk in the current directory.

From the previous example, there should be three values in the dictionary (the new script tests to see if one of them exists). This example adds the Tampa Bay Rays, with a payroll of $67 million, as another key.

The script verifies that the ‘Blue Jays’ key exists in the dictionary, using the following code:

if db['Blue Jays'] != None:
    print('Found Blue Jays')
else:
    print('Error: Missing item')

Next, the script prints out all of the keys and values in the dictionary:

for key in db.keys():
    print('Key = ', key, ' value = ', db[key])

Note that there should now be four entries.

After printing out all the entries, the script removes one using del:

del db['Rays']

The script then prints out all the keys and values again, which should result in three entries, as show in the output. Finally, the close method closes the dictionary, which involves saving all the changes to disk, so the next time the file is opened, it will be in the state we left it.

As you can see from these examples, the API for working with persistent dictionaries is very simple because it works with files and like dictionaries.

External Links:

Python Database Programming at wiki.python.org

Python Database Programming at python.about.com

Databases at docs.python-guide.org

Python Database Programming: Part One

Python databaseMost large enterprise-level systems use databases for storing data. In order for Python to be capable of handling these types of enterprise applications, the language must be able to access databases.

For Python database programming, Python provides a database Application Programming Interface (API) that enables you to access most databases regardless of the databases’ native API. Although minor differences exist between different implementations of databases, for the most part you can access databases such as Oracle or MySQL from your Python scripts without worrying too much about the details of the specific databases. There are two main database systems supported by Python: dbm persistent dictionaries and relational databases with the DB API. Moreover, you can use add-ons such as MySQL-python to make direct database queries from within your Python scripts.

Python Database Programming: Persistent Dictionaries

A persistent dictionary, as the name suggests, is a Python dictionary that can be saved to disk. You store name/value pairs in the dictionary, which is saved. Thus, if you save data to a dictionary that’s backed by a dbm, the next time you start your program, you can read the value stored under a given key again, once you’ve loaded the dbm file. The dictionaries work like normal Python dictionaries; you might recall that the syntax of a statement creating a dictionary looks something like this:

payroll = { ‘Orioles’: 118, ‘Yankees’: 211, ‘Blue Jays’: 120 }

With a persistent dictionary, the main difference is that the data is written to and read from disk. An additional difference is that the keys and the values must both be strings; therefore our above example would have to be rewritten:

payroll = { ‘Orioles’: ‘118’, ‘Yankees’: ‘211’, ‘Blue Jays’: ‘120’ }

Python Database Programming: Modules

Python supports a number of dbm modules for Python database programming. Each dbm module supports similar interface and uses a particular C library to store the data to disk. The difference is in the underlying binary format of the data files on disk.

DBM, short for database manager, acts as a generic name for a number of C language libraries originally created on UNIX systems. The names of these libraries (e.g. dbm, gdbm, etc.) correspond closely to the available modules that provide the needed functionality within Python.

Python supports a number of dbm modules, each of which supports a similar interface and uses a particular C library to store the data. The underlying binary format of each module is different. As a result, each dbm module creates incompatible files. If you create a dbm persistent dictionary with one dbm module, you must use the same module to read the data. None of the other modules will work with a data file created by another module.

Module Description
dbm Chooses the best dbm module
dbm.dumb Uses a simple, but portable, implementation of the dbm library
dbm.gnu Uses the GNU dbm library

Originally, this library was only available with the commercial versions of UNIX. This led to the creation of alternative libraries: e.g. the Berkeley UNIX library and GNU’s gdbm.

With all the incompatible file formations, all these libraries can be an issue. But by using the dbm module, you can sidestep this issue. The dbm module will choose the best implementation available on your system when creating a new persistent dictionary. When it reads a file, the dbm module uses the whichdb function to make an informed guess as to which library created the database. It is usually good practice to use the dbm module, unless you need to use a specific feature of one of the dbm libraries.

In the next article on Python database programming, we’ll start to cover the nuts and bolts of programming using the dbm module in Python.

External Links:

Python Database Programming at wiki.python.org

Python Database Programming at python.about.com

Databases at docs.python-guide.org

Tkinter GUI Framework: Part Three

Tkinter GUI

Creating dialog boxes in Tkinter using the Pydev module with Eclipse.

Form and function are key to creating a good GUI. In this article, we’ll go one step further and control the actual appearance of widgets.

Up to this point, we have used the default look for our widgets. This is somewhat drab, so to create programs that are visually appealing, we want to tweak the look of our widgets. For example, we can change the font and background/foreground colors.

import tkinter
from tkinter import *
root = Tk()
labelfont = ('times', 36, 'italic')

widget = Label(root, text='This is a test.')
widget.config(bg='black', fg='blue')

widget.pack(expand=YES, fill=BOTH)
root.mainloop()

Although all the program does is display a window with some text in it, the design does draw the user’s attention.

Radio Buttons and Checkboxes

In addition to windows, frame, labels and buttons, sometimes you want to use radio buttons and checkboxes to give your users more choices. Aside from appearance, radio buttons and checkboxes differ in one significant way: radio buttons offer users a list of options, but allow them to select only one; checkboxes offer users many options and lets them choose as many as they want.

For example, here’s some code that implements radio buttons:

import tkinter 
from tkinter import *
state = ''
buttons = []

def choose(i): 
	global state
	state = i
	for btn in buttons: 
		btn.deselect()
	buttons[i].select()

root = Tk()
for i in range(4):
	radio = Radiobutton(root, text=str(i), value=str(i), command=(lambda i=i: choose(i) )
	radio.pack(side=BOTTOM) 
	buttons.append(radio)

root.mainloop()
print("You chose the following number: ",state)

This program creates a series of buttons ranging from 0-3 (four in total) with the number 1, 2 and 3 highlighted by default. The user can then choose any of the buttons. Once a button is chosen, any other button’s state becomes False, meaning that the button is no longer selected. When the users close out of the program, they are given a statement showing which number they chose.

For a similar effect with checkboxes, try this code:

from tkinter import *
states = []
def check(i):
	states[i] = not states[i]

root = Tk()

for i in range(4):
	test = Checkbutton(root, text=str(i), command=(lambda i=i: check(i)) )
	test.pack(side=TOP)
	states.append(0)
root.mainloop()
print(states)

The last line in the program is print(states), which prints out the states list – the values of the check boxes. This, if you check off boxes 1 and 4, your result will be:

[True, 0, 0, True]

Dialog Boxes

Sometimes you will want to give the user a piece of additional information. You have probably seen dialog boxes in programs. They pop up whenever there is an error, or a program wants to confirm something. Tkinter offers two types of dialog boxes: modal and nonmodal. Modal dialog boxes wait for some action from the user before going away, andpause the progress of the program. Nonmodal dialog boxes do not interrupt the flow of the program.
Creating a dialog box in Tkinter is almost a trivial process. For example, we can create a simple function to generate a dialog box like so:

def dialog():
	win = Toplevel()
	Label(win, text='This is a dialog box').pack()

We need some means of invoking the dialog box from the main window, so the main program will have this code:

root = Tk()
Button(root, text='Click This', command=dialog).pack()
root.mainloop()

You will also need the usual headers at the beginning:

import sys
from tkinter import *

This will create a main window, and when you click on the button in the main window, it will launch a simple, nonmodal dialog box that has some text in it. This is OK, but we really want a dialog box that actually does something, so let’s rewrite the dialog function:

def dialog():
	win = Toplevel()
	Label(win, text='This is a dialog box').pack()
	Button(win, text='Click this button', command=win.destroy).pack()
	if makemodal:
		win.focus_set()
		win.grab_set()
		win.wait_window()

You will need to add this line before the dialog function:

makemodal = (len(sys.argv) > 1)

When the button in the main window is clicked, the program will launch a modal dialog box and that box will take the focus. When you click on the button in the dialog box, it will close itself, and the original window will take back focus.

External Links

How to Install Tkinter at unpythonic.net

Tkinter wiki at python.org

Tkinter GUI Framework: Part Two

Tkinter GUIIn the previous article, we introduced Tkinter and provided some simple examples. In this article, we will introduce the concept of layouts.

GUI Layouts: Widget Hierarchy and Packing Order

When creating a GUI, it is important to consider the hierarchy of the widgets inside the GUI. This hierarchy is commonly referred to as parent-child. Let’s consider a simple example:

from tkinter import *

def fcall():
	print('This is a function call.')

win = Frame()
win.pack()
Label(win, text='Click Function to make a function call or Quit to Exit').pack(side=TOP)
Button(win, text='Add', command=result).pack(side=LEFT)
Button(win, text="Quit', command=win.quit).pack(side=RIGHT)

The first widget here is the top-level window, which acts as a parent. Next, we have a widget called win, which has a child of its own: a frame widget. The win widget is a child of the top-level window.

Next, we have a label and two buttons, all of which are children of the frame widget. A frame widget is a widget whose purpose is to hold other widgets, and thus allow the programmer the flexibility to create a layout determining where on the window each widget should appear. GUI programming involves working with many different frame widgets, each occupying a specific spot on the top-level window, with each frame having its own set of widgets. These widgets that belong to each frame will, as children of their own respective frame, be limited to the space provided them by their parent frame.

For example, if you have two frames of the same size, each taking up half the window, and assign a button widget to each frame, the button assigned to the left frame will only be able to be placed within the left-hand side of the window. Likewise, the button assigned to the frame on the right side will be constrained to that section. If you were to pack the button in the left frame to the right, it would appear to the user to be in the center of the top-level window.

Another important aspect of layout is known as packing order. When you create each widget, and pack them, they are given all of the space for their region. For example, if you pack a button on the LEFT, it will occupy all of the left-hand space. When you create a second widget and pack it to the left as well, the initial button is shrunk, but still holds the left-most space. This process continues, with each button shrunking to provide room for the other widgets. However, the buttons never move from their original space. The first button packed to the left will always be the leftmost. Likewise, the second button packed to the left will always be the second closest to the left.

For example, we could rearrange our code from earlier to demonstrate how this works:

from tkinter import *

def fcall():
	print('This is a function call.')

win = Frame()
win.pack()
Button(win, text='Add', command=result).pack(side=LEFT)
Label(win, text='Click Function to make a function call or Quit to Exit').pack(side=TOP)
Button(win, text="Quit', command=win.quit).pack(side=RIGHT)

This shows how the program looked before we modified the code:

Tkinter GUI

And this is how it looks with the modified code:

Tkinter GUI

External Links

How to Install Tkinter at unpythonic.net

Tkinter wiki at python.org

Python Iterators: Part Five

Python iteratorAnother common use for list comprehensions is with files. A file object has a readlines method that loads the file into a list of line strings all at once; e.g.:

>>> fp = open('simple.py')
>>> lines = fp.readlines()
>>> lines
['a = [1, 2, 3, 4]\n', 'for x in a:\n', 'print(x)\n', 'print(x*2)\n','\n']

This will work, but the lines in the result all include the newline character. Perhaps we can use list comprehensions to get rid of all the newlines.

One way we could accomplish this is by running each line in the list through the string rstrip method to remove whitespaces on the right side. So now we have:

>>> lines = [line.rstrip() for line in lines]
>>> lines
['a = [1, 2, 3, 4]', 'for x in a:', 'print(x)', 'print(x*2)','']

This works as we expected. Because the list comprehensions are an iteration conect just like the for loop statements, however, we do not have to open the file ahead of time. If we open the file inside the expression, the list comprehension will automatically use the iteration protocol used earlier. It will read one line from the file at a time by calling the file’s next method, run the line through the rstrip expression, and add it to the result list. The code now looks like this:

>>> lines = [line.rstrip() for line in open('simple.py')]
>>> lines
['a = [1, 2, 3, 4]', 'for x in a:', 'print(x)', 'print(x*2)','']

Again, the code does what we want it to do. This expression does a lot implicitly, although we are getting a lot of work done for free. Python scans the file and builds a list of operation results automatically. It is also an efficient way to write the code: because most of the work is done inside the Python interpreter, it is likely much faster than the equivalent for statement. Especially for large files, the speed advantages of list comprehensions can be considerable.

List comprehensions are also expressive. For example, we can run any string operation on a file’s lines as we iterate. For example, we can use a list comprehension to convert the contents of the file to uppercase:

>>> [line.upper() for line in open('simple.py')]
['A = [1, 2, 3, 4]\n', 'FOR X IN A:\n', '\tPRINT(X)\n', '\tPRINT(X*2)\n', '\n']

If we also want to strip out the newline, we can do that too:

>>> [line.rstrip().upper() for line in open('script1.py')]
['A = [1, 2, 3, 4]', 'FOR X IN A:', '\tPRINT(X)', '\tPRINT(X*2)', '']

Beyond this complexity level, however, list comprehension expressions can become too compact for their own good. They are generally intended for simple types of iterations; for more involved programming statements, a simple for statement structure will likely be easier to understand and modify in the future.

External Links:

Python Iterators at Python Wiki

Python Iterator tutorial at bogotobogo.com

Python Iterators: Part Four

Python iteratorsTo see a practical application of the iteration protocol, let’s consider the case of the list comprehension. You can use range to change a list as you step across it; e.g.:

>>> L = [1, 2, 3, 4, 5]
>>> for i in range(len(L)):
	L[i] += 1
>>> L
[2, 3, 4, 5, 6]

This works, but there is an easier way. We can replace the loop with a single expression that produces the desired list:

>>> L = [x + 1 for x in L]
>>> L
[2, 3, 4, 5, 6]

The final result is the same, but it requires less coding on our part and is substantially faster to boot. The list comprehension is not exactly the same as the for loop statement version in that it makes a new list object.

The list comprehension’s syntax is derived from a construct in set theory notation that applies an operation to each item in set. Alternatively, you can think for it as a backwards for loop.

List comprehensions are written in square brackets because they are ultimately a way to construct a new list. They begin with an arbitrary expression that we make up, which uses a loop variable that we make up (x + 1). That is followed by what you should recognize as the head of the for loop, which names the loop variable, and an iterable object (for x in L).

To run the expression, Python executes an iteration across L inside the interpreter, assigning x to each item in turn, and collects the results of running the items through the expression on the left side. The result list we get back is exactly what the last comprehension says: a new list containing x + 1 for every x in L.

Technically, we do not need list comprehensions, because we can always build up a list of expression results manually with for loops. List comprehensions, however, are more concise to write, and because this code pattern of building up result lists is so common in Python work, they turn out to be very handy in many contexts. Moreover, list comprehensions can run much faster than manual for loop statements because their iterations are performed in C language speed inside the interpreter (rather than with manual Python code). Especially for larger data sets, there is a large performance advantage.

External Links:

Python Iterators at Python Wiki

Python Iterator tutorial at bogotobogo.com

Python Iterators: Part Three

Python iteratorsBesides files and physical sequences such as lists, other types also have useful iterators. In older versions of Python, for example, one would step through the keys of a dictionary by requesting the keys list explicitly:

>>> K = {'alpha':1, 'bravo':2, 'charlie':3}
>>> for key in K.keys():
	print(key,K[key])

alpha 1
bravo 2
charlie 3

In more recent versions of Python, however, dictionaries have an iterator that automatically, returns one key at a time in an iteration context:

>>> I = iter(K)
>>> next(I)
'alpha'
>>> next(I)
'bravo'
>>> next(I)
'charlie'
>>> next(I)
Traceback (most recent call last):
  File "<pyshell#88>", line 1, in 
    next(I)
StopIteration

The effect here as that we no longer need to call the keys method to step through dictionary keys. The for loop will use the iteration protocol to grab one key each time through.

Other Python object types also support the iterator protocol and therefore may be used in for loops as well. For example, a shelf is a persistent, dictionary-like object in which the values can be arbitrary Python objects, such as class instances, recursive data types, and objects. Shelves support the iterator protocol. So does os.popen, a tool for reading the output of shell commands:

>>> import os
>>> I = os.popen('dir')
>>> I.__next__()
' Volume in drive C has no label.\n'
>>> I.__next__()
' Volume Serial Number is 9664-E470\n'
>>> next(I)
Traceback (most recent call last):
  File "<pyshell#93>", line 1, in 
    next(I)
TypeError: '_wrap_close' object is not an iterator

Note that the popen objects support a P.next() method in Python 2.6. In 3.0 and later, they support the P.__next__() method, but not the next(P) built-in. It is not clear if this behavior will continue in future releases, but as of Python 3.4.1, it is still the case. This is only an issue for manual iteration; if you iterate over these objects automatically with for loops and other iteration contexts, they return successive lines in either Python version.

The iteration protocol is also the reason we have had to wrap some results in a list call to see their values all at once. Objects that are iterable return results one at a time, not in a physical list:

>>> RG = range(5)
>>> RG 
range(0, 5)
>>> I = iter(RG)
>>> next(I)
0
>>> next(I)
1
>>> list(range(5))
[0, 1, 2, 3, 4]

Now that you have a better understanding of this protocol, you should be able to see how it explains why the enumerate tool introduced in the prior chapter works the way it does:

>>> EN = enumerate('quick')
>>> EN

>>> I = iter(EN)
>>> next(I)
(0, 'q')
>>> next(I)
(1, 'u')
>>> list(enumerate('quick'))
[(0, 'q'), (1, 'u'), (2, 'i'), (3, 'c'), (4, 'k')]

We don’t normally see what is going on under the hood because for loops run it for us automatically to step through results. In face, everything that scans left-to-right in Python employes the iteration protocol.

External Links:

Python Iterators at Python Wiki

Python Iterator tutorial at bogotobogo.com

Python Iterators: Part Two (The Next Function)

Python iteratorsIn the first article in this series, we introduced Python iterators and how they can be used to streamline Python code. In this article, we will continue our look at iterators, beginning with the next function.

To support manual iteration code, Python 3.0 also provides a built-in function, next, that automatically calls an object’s __next__ method. Given an iterable object X, the call next(X) is the same as X.__next__(). With files, for example, either form could be used:

>>> f = open('simple.py')
>>> f.__next__()

>>> f = open('simple.py')
>>> next(f)

Technically, there is one more piece to the iteration protocol. When the for loop begins, it obtains an iterator from the iterable object by passing it to the iter built-in function; the object returned by iter has the required next method. We can illustrate this with the following code:

>>> LS = [1, 2, 3, 4, 5]
>>> myIter = iter(LS)
>>> myIter.next()
1
>>> myIter.next()
2

This initial step is not required for files, because a file object is its own iterator: files have their own __next__ method and so do not need to return a different object that does.

Lists and many other built-in object, are not their own iterators because they support multiple open operations. For such objects, we must call iter to start iterating. For example:

>>> LS = [1, 2, 3, 4, 5]
>>> iter(LS) is LS
False
>>> LS.__next__()
Traceback (most recent call last):
  File "<pyshell#50>", line 1, in 
    LS.__next__()
AttributeError: 'list' object has no attribute '__next__'

>>> myIter = iter(LS)
>>> myIter.__next__()
1
>>> next(myIter)
2

Although Python iteration tools call these functions automatically, we can use them to apply the iteration protocol manually, too. The following demonstrates the equivalence between automatic and manual iteration:

>>> LS = [1, 2, 3, 4, 5]
>>> for X in LS:
	print(X ** 2, end=' ')

1 4 9 16 25

>>> myIter = iter(LS)
>>> while True:
	try:
		X = next(I)
	except StopIteration:
		break
	print(X ** 2, end=' ')

1 4 9 16 25 

To understand this code, you need to know that try statements run an action and catch exceptions (we covered that in the series of articles on exceptions). Also, for loops and other iteration contexts can sometimes work differently for user-defined classes, repeatedly indexing an object instead of running the iteration protocol.

External Links:

Python Iterators at Python Wiki

Python Iterator tutorial at bogotobogo.com

Python Strings: Part Six

Python stringsIn the previous article, we began our look at indexing and slicing. In this article, we will continue our look at slicing and show some practical applications of slicing.

In Python 2.3 and later, there is support for a third index, used as a step. The step is added to the index of each item extracted. The three-index form of a slice is X[I:J:K], which means “extract all the items in X, from offset I through J-1, by K.” The third limit, K, defaults to 1, which is why normally all items in a slice are extracted from left to right. But if you specify an explicit value, you can use the third limit to skip items or to reverse their order.

For instance, a[1:10:2] will fetch every other item in X from offsets 1-9; that is, it will collect the items at offsets 1, 3, 5, 7 and 9. As usual, the first and second limits default to 0 and the length of the sequence, respectively, so a[::2] gets severy other item from the beginning to the end of the sequence:

>>> a = 'nowisthetimeto'
>>> a[1:10:2]
>>> 'oitei'

You can also use a negative stride. For example, the slicing expression “every”[::-1] returns the new string “yreve” – the first two bounds default to 0 and the length of the sequence, as before, and a stride of -1 indicates that the slice should go from right to left instead of the usual left to right. The effect is to reverse the sequence:

>>> a = 'every'
>>> a[::-1]
'yreve'

With a negative stride, the meanings of the first two bounds are essentially reversed. That is, the slice a[5:1:-1] fetches the items from 2 to 5, in reverse order (the result contains items from offsets 5, 4, 3, and 2):

>>> a = 'thequick'
>>> a[5:1:-1]
'iuqe'

Skipping and reverse like this are the most common use cases for three-limit slices, but see Python’s standard library manual for more details.

Slices have many applications. For example, argument words listed on a system command line are made available in the argv attribute of the built-in sys module:

#File command.py - echo command line args
import sys
print(sys.argv)

% python command.py -1 -2 -3
['command.py', '-1', '2', '3']

Usually, however, you’re only interested in inspected the arguments that follow the program name. This leads to a typical application of slices: a single slice expression can be used to return all but the first item of a list. Here, sys.argv[1:] returns the desired list, [‘-1’, ‘-2’, ‘-3’]. You can then process this list without having to accommodate the program name at the front.

External Links:

Strings at docs.python.org

Python Strings at Google for Developers

Python strings tutorial at afterhoursprogramming.com